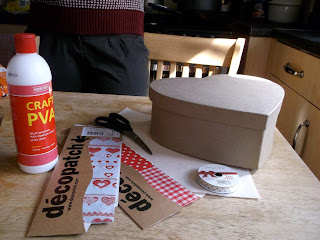
Hey Guy's,
This is it… The ever so slightly, later then planned Pinterest DIY, Blog post!
So for this post, I had so many things too choose from, it was hard. But I wanted something, that I could make and use/keep.
So I decided on a memory box of sorts.
So let's get started….
I picked all of these products up from Hobby craft, as I like to able to get everything under one roof, you know?
All you need is;
A box. (heart-shape optional)
2 packs of decopatch of your choice. (I got 2 because they were on offer.)
Some ribbon. (again optional.)
Some standard craft PVA glue.
2 sheets of felt for the lining. (Colour optional I chose cream.)
A paint brush.
A pair of scissors.
Step 1;
In my book anyway, was to line the outside, of the box with the decopatch. I chose to use decopatch, because I had herd some really good things about it, and wanted to give it a go!
All you have to do, using the paint brush, brush the glue round the outside of the box.
And then gently place the decopatch on top of the wet glue. Do this until the outside is covered.
It should look something like this.
While the outside of the box is drying. We did the same to the lid.
Leave them to dry for 30 minutes, or so.
Then draw round the outside of the box on to the felt for the lining. After I cut them out, I placed them inside to make sure they fit, before gluing them down.
Repeat the process for the lid.
After lining the boxes I decided the inside looked a little bare, so I decided to decorate the inside too. My one suggestion, if you wanted to paint the inside, do it before you line the bottom.
Ta-da! Finished Box! I added a little ribbon on the top of the lid. But you can add whatever you like!
Hope you guys like getting crafty! I would love to see, some of your crafty projects.


No comments:
Post a Comment